
Job Hazard Analysis (JHA): A Practical, Step‑by‑Step Framework
Why JHAs Matter More Than Most Companies Realize
A Job Hazard Analysis (JHA) is one of the most powerful tools in workplace safety — yet it’s also one of the most misunderstood. Too many organizations treat JHAs as paperwork instead of what they really are: a structured way to understand how work actually happens and where people can get hurt.
A well‑done JHA does three things exceptionally well:
- Identifies hazards before someone gets injured
- Helps supervisors and workers agree on the safest way to perform a task
- Drives meaningful conversations about risk, controls, and expectations
And here’s the part most companies miss: JHAs are one of the strongest building blocks of a healthy safety culture. When workers are involved in identifying hazards and shaping solutions, trust grows — and so does engagement.
This guide walks you through the entire JHA process, step‑by‑step, with practical examples you can use immediately.
What Is a Job Hazard Analysis (JHA)?
A Job Hazard Analysis is a method used to break down a job into steps, identify the hazards associated with each step, and determine the safest way to perform the work.
A JHA typically includes:
- The job or task being analyzed
- Each step of the task
- Hazards associated with each step
- Recommended controls to eliminate or reduce the hazards
OSHA defines a JHA as a technique that focuses on job tasks to identify hazards before they occur. OSHA’s JHA guide
When Should You Conduct a JHA?
You should complete a JHA when:
- A new job or process is introduced
- A job changes significantly
- A job has a history of injuries or near misses
- Workers express concerns about a task
- You’re training new employees
- You’re reviewing or updating procedures
A good rule of thumb: If a task can seriously injure someone, it deserves a JHA.
Step 1: Select the Job or Task to Analyze
Start with tasks that have:
- High injury potential
- Frequent worker exposure
- A history of incidents or near misses
- Complex steps or multiple people involved
- Significant ergonomic or environmental hazards
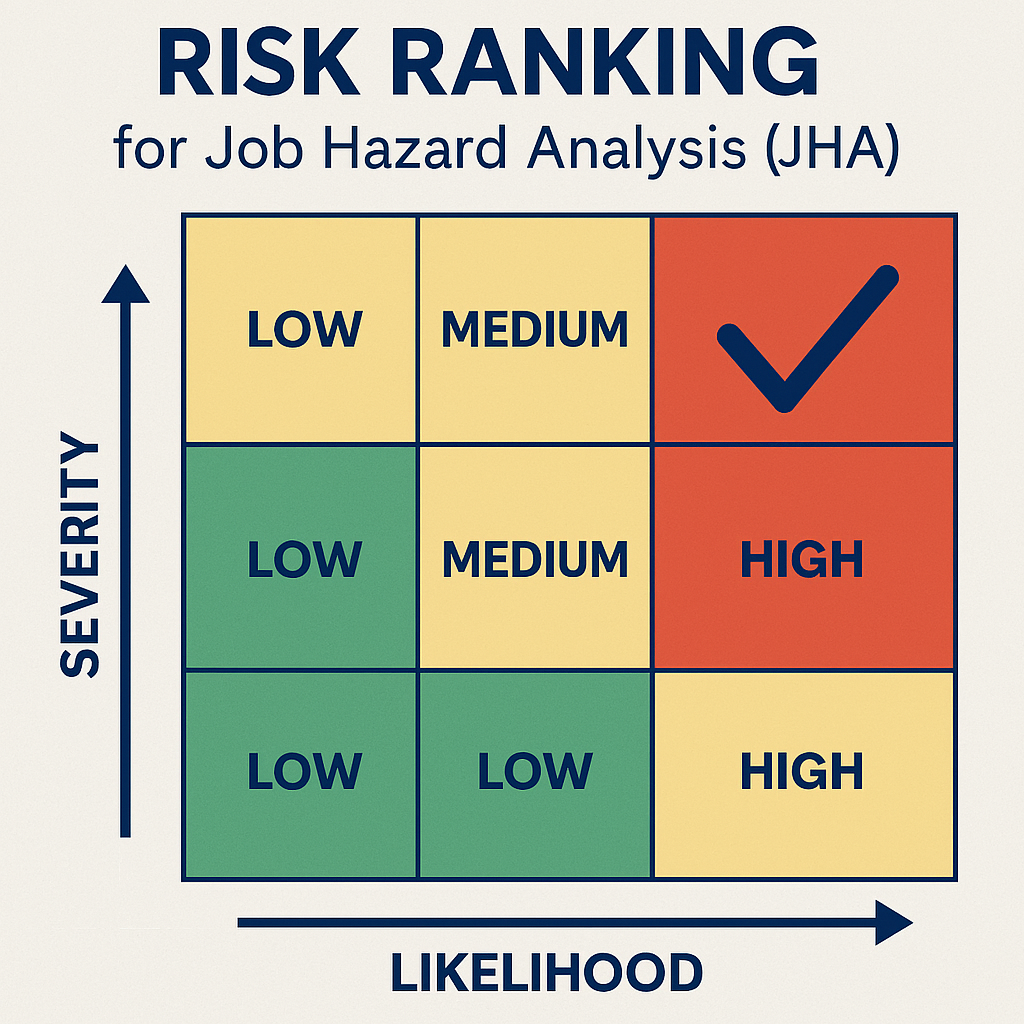
Depending on the size and complexity of your company, it’s not uncommon to have hundreds of tasks or work procedures. So where do you start? Using incident data trends or risk ranking your tasks will help prioritize.
Step 2: Break the Job Into Clear, Manageable Steps
A common mistake is breaking tasks down too far or not far enough.
Aim for 6–12 steps that describe what is done, not how it’s done.
Poor Example:
- Grab tool
- Walk to machine
- Turn knob
- Adjust part
Better Example:
- Prepare workstation
- Set up equipment
- Perform the operation
- Inspect the finished product
- Shut down and clean up
The goal here is clarity, not micromanagement.
Step 3: Identify the Hazards for Each Step
This is where the real value of a JHA comes from.
Look for hazards related to:
- Ergonomics/Motion (lifting, bending, reaching)
- Equipment (pinch points, rotating parts, stored energy)
- Environment (noise, heat, chemicals, lighting)
- Human factors (fatigue, rushing, distractions)
- Process issues (poor layout, unclear instructions)
A guide to hazard identification can be found here Hazard Identification Made Simple: Recognizing Risks Before They Become Incident.
Encourage workers to speak freely. For more information on developing a strong safety culture, see The Complete Guide to Building a Strong Safety Culture
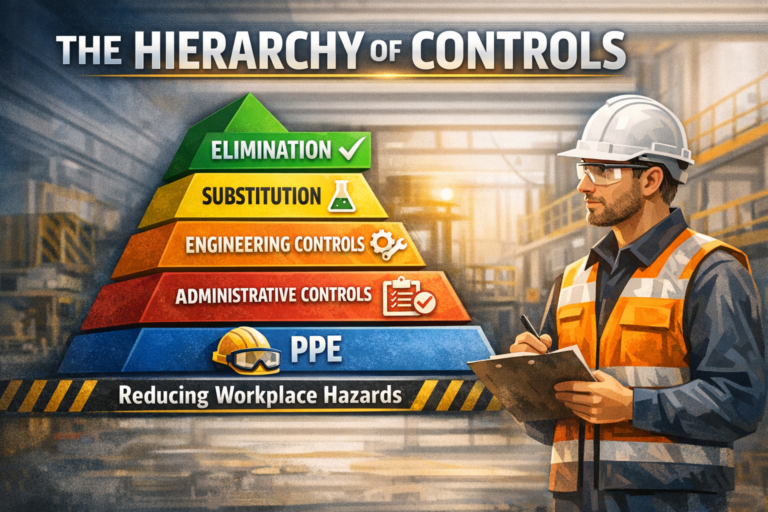
Step 4: Determine the Best Controls Using the Hierarchy of Controls
Controls should follow the hierarchy:
- Elimination – Remove the hazard entirely
- Substitution – Replace with something safer
- Engineering Controls – Guarding, ventilation, automation
- Administrative Controls – Training, job rotation, procedures
- PPE – Last line of defense

Step 5: Document the JHA Clearly and Share It With Workers
A JHA is only useful if:
- It’s easy to read
- It’s accessible
- Workers understand it
- Supervisors reinforce it
Use simple language. Avoid jargon. Include photos or diagrams when possible.
And most importantly: Review JHAs regularly. A JHA written five years ago for a job that has changed three times is a liability, not a safety tool.
It will be useful to create an inventory of your completed JHAs, including the date it was created and when it was last reviewed.
Step 6: Use the JHA for Training, Audits, and Continuous Improvement
A strong JHA becomes the foundation for:
- New‑hire training
- Refresher training
- Safety audits
- Pre‑task briefings
- Incident investigations
- Continuous improvement discussions
Common JHA Mistakes (and How to Avoid Them)
1. Treating JHAs as paperwork
A JHA is a tool, not a form. Use it actively.
2. Not involving workers
Workers know the job better than anyone. Their input is essential.
3. Focusing only on PPE
If every control ends with “wear gloves,” your JHA needs work.
4. Overcomplicating the process
Keep steps clear and manageable.
5. Never updating the JHA
Jobs evolve. Your JHAs should too.
How JHAs Strengthen Safety Culture
JHAs improve culture by:
- Encouraging open communication
- Building trust between workers and supervisors
- Showing that leadership values safety
- Reducing blame by focusing on systems, not people
- Creating shared ownership of risk
Complete Guide to Building a Strong Safety Culture.
JHAs Are One of the Most Practical Tools in Safety
A well‑done JHA is more than a compliance requirement — it’s a practical, hands‑on method for preventing injuries and improving how work gets done. When workers are involved and controls are thoughtfully selected, JHAs become a cornerstone of a safer, more engaged workplace.