Hazard Identification Made Simple: Recognizing Risks Before They Become Incidents
Hazard identification is the foundation of every strong safety program. If you can’t recognize hazards, you can’t control them — and if you can’t control them, you can’t prevent injuries. This guide gives supervisors and employees a clear, practical framework for identifying hazards and applying effective controls in any workplace.
Whether you’re completing a Job Hazard Analysis (JHA), planning a task, or responding to changing conditions, this guide will help you think ahead, reduce risk, and protect your team.
Why Hazard Identification Matters
Most workplace injuries happen because a hazard wasn’t recognized or wasn’t controlled properly. Effective hazard identification:
- Prevents injuries and near misses
- Reduces downtime and operational disruptions
- Improves employee confidence and engagement
- Strengthens your safety culture
- Supports compliance with OSHA and industry standards
Hazard identification is not a one‑time activity — it’s a continuous process that happens before, during, and after work.
What Is a Hazard?
A hazard is anything with the potential to cause harm — to people, equipment, property, or the environment.
Common hazard categories include:
- Physical: struck‑by, caught‑in, slips, trips, falls, noise, vibration
- Chemical: vapors, dusts, fumes, corrosives, flammables
- Biological: mold, bacteria, viruses, bloodborne pathogens
- Ergonomic: lifting, repetitive motion, awkward postures
- Electrical: energized parts, arc flash, damaged cords
- Environmental: heat, cold, wildlife, weather
- Behavioral/Organizational: rushing, fatigue, poor communication
Understanding these categories helps employees recognize hazards faster and more consistently.
The Hazard Identification Process
Hazard identification is most effective when it follows a structured approach. Use this simple, repeatable process:
1. Break the Job Into Steps
Before you can identify hazards, you need to understand the task.
- List each step in order
- Keep steps short and action‑based
- Avoid combining multiple actions into one step
This aligns perfectly with the Job Hazard Analysis (JHA) process. Information on performing a JHA can be found here Job Hazard Analysis (JHA): A Practical, Step‑by‑Step Framework.
2. Identify Hazards for Each Step
Ask these questions:
- What could go wrong?
- What could cause an injury?
- What could change unexpectedly?
- What has gone wrong in the past?
- What hazards are present in the environment?
Encourage employees to speak up — they often see hazards supervisors miss. Ask “If you had a loved one doing this task for the first time, what would you warn them about?
3. Determine Who Might Be Harmed
Consider:
- Employees performing the task
- Nearby workers
- Visitors or contractors
- Maintenance personnel
- Anyone entering the work area
This helps you choose the right controls.
4. Evaluate the Risk
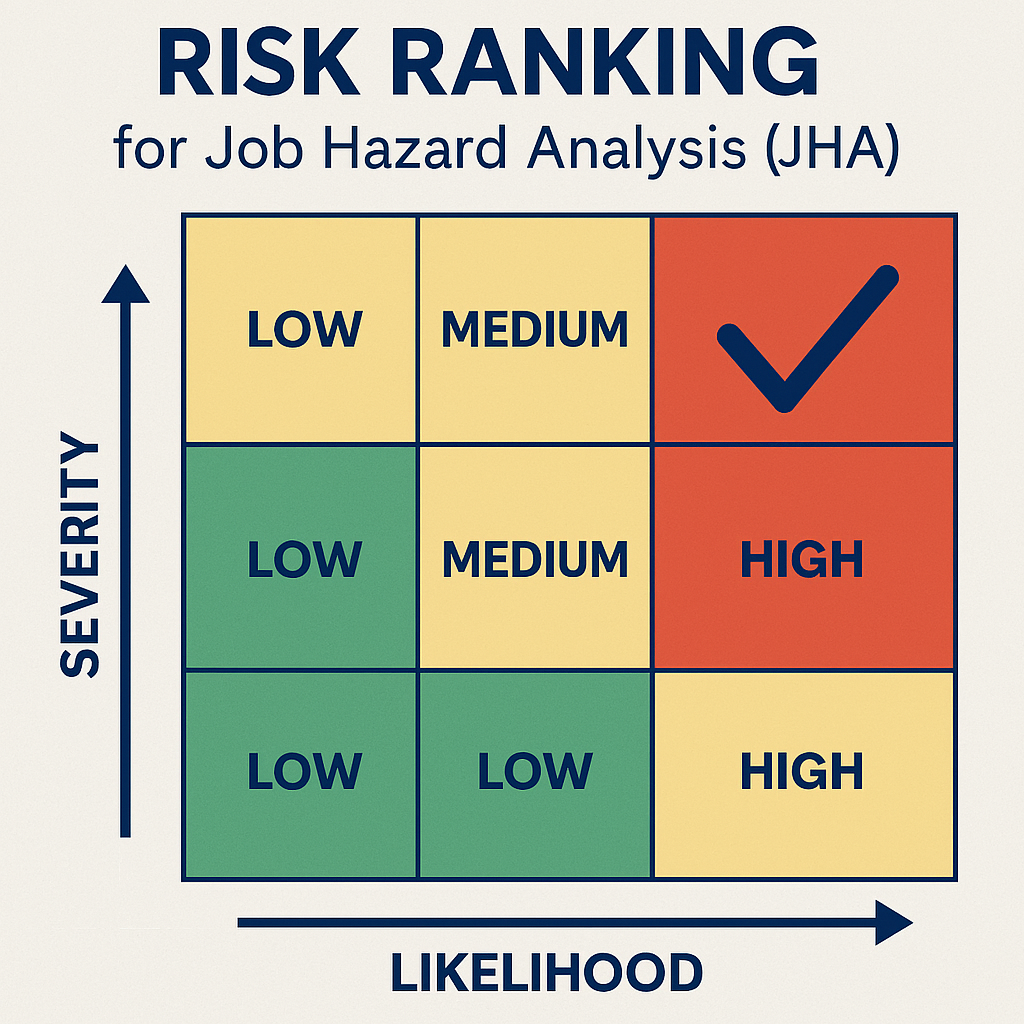
Risk is a combination of:
- Severity: How bad could the outcome be?
- Likelihood: How likely is it to happen?
You can use a simple risk matrix or your company’s rating system.
5. Apply Controls Using the Hierarchy of Controls
Once hazards are identified, choose the most effective controls.
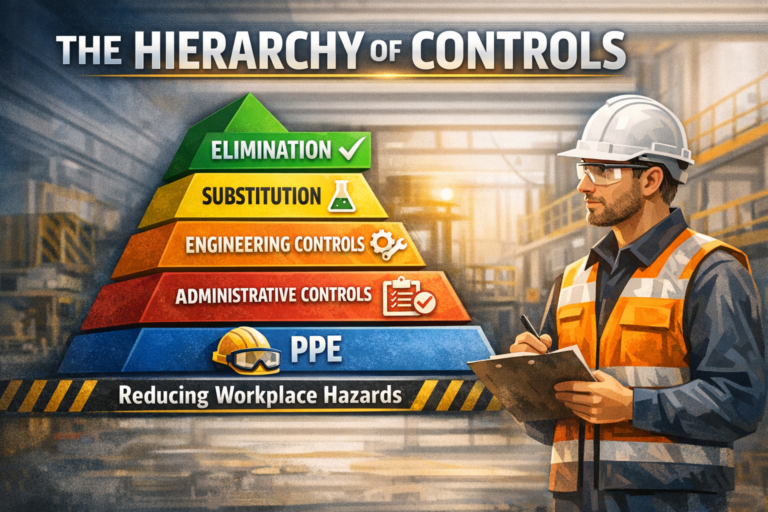
The Hierarchy of Controls (Explained Simply)
The Hierarchy of Controls ranks control methods from most effective to least effective.
1. Elimination (Most Effective)
Remove the hazard entirely.
Examples:
- Remove unnecessary steps
- Stop using a hazardous chemical
- Relocate work away from traffic
2. Substitution
Replace the hazard with something safer.
Examples:
- Use a less toxic chemical
- Swap manual lifting for mechanical lifting
- Replace sharp tools with safer alternatives
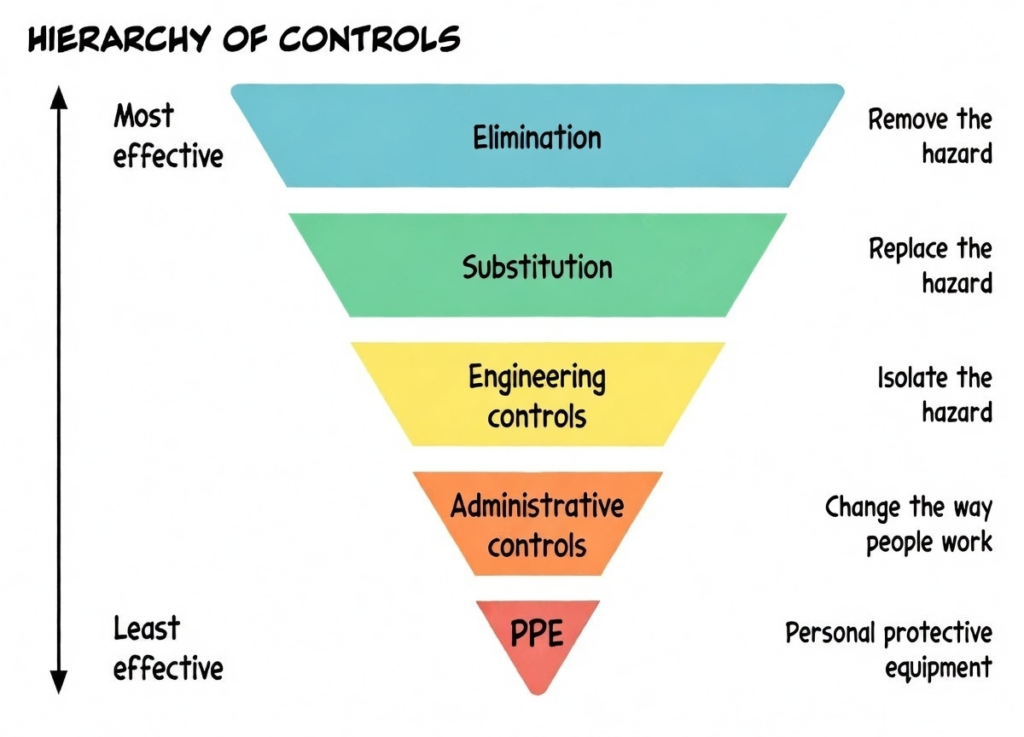
3. Engineering Controls
Isolate people from the hazard.
Examples:
- Machine guards
- Ventilation systems
- Barriers and railings
- Lockout/tagout devices
4. Administrative Controls
Change the way people work.
Examples:
- Training
- Procedures
- Job rotation
- Signage
- Permits
5. Personal Protective Equipment (Least Effective)
Protect the worker with PPE.
Examples:
- Gloves
- Hard hats
- Respirators
- Safety glasses
PPE is important — but it should never be the only control unless no other options exist.
Common Hazard Identification Mistakes
Avoid these pitfalls:
- Relying only on PPE
- Skipping hazard identification for “routine” tasks
- Copy‑pasting old JHAs
- Ignoring environmental hazards
- Failing to reassess when conditions change
- Not involving employees in the process
These mistakes lead to blind spots — and blind spots lead to injuries.
How to Build a Strong Hazard Identification Culture
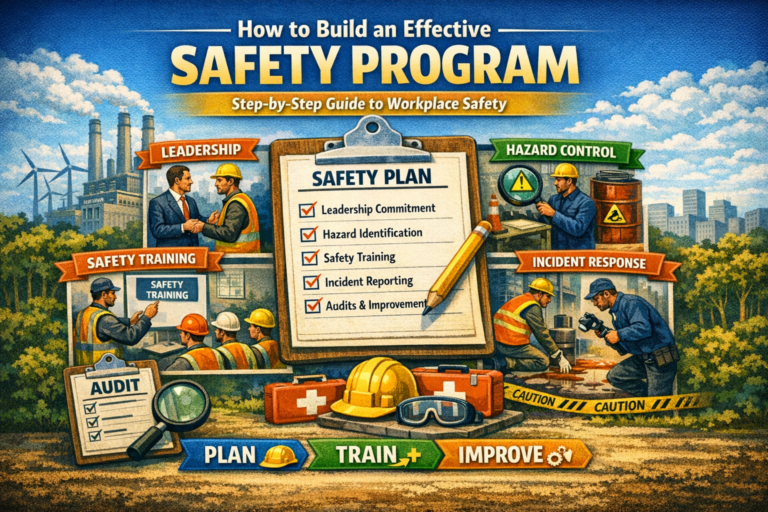
A strong safety culture encourages everyone to:
- Speak up about hazards
- Report near misses
- Participate in JHAs
- Suggest improvements
- Stop work when something feels unsafe
Supervisors play a critical role by modeling these behaviors and reinforcing them daily. If you feel your safety culture is lacking, read The Complete Guide to Building a Strong Safety Culture.
Practical Examples of Hazard Identification & Control
Example 1: Using a Ladder
Hazards: falls, unstable surface, electrical contact
Controls: inspect ladder, maintain 3‑point contact, avoid overhead power lines, secure base
Example 2: Lifting a Heavy Object
Hazards: strains, dropped loads, pinch points
Controls: mechanical lifting aids, team lift, clear communication, proper body mechanics
Example 3: Working Near Moving Equipment
Hazards: struck‑by, caught‑between
Controls: barriers, spotters, high‑visibility clothing, exclusion zones
When to Reassess Hazards
Hazards should be reassessed:
- Before starting any task
- When conditions change
- When new equipment is introduced
- After an incident or near miss
- When new employees join the task
- During routine inspections
Performing a Job Hazard Analysis can be a great tool to incorporate into your Management of Change (MOC) process.
Hazard identification is continuous — not a one‑time event.
Conclusion
Hazard identification and control are the backbone of workplace safety. When employees and supervisors work together to recognize hazards and apply effective controls, injuries become preventable, work becomes more efficient, and safety culture grows stronger.
Use this guide as a foundation for your JHA process, training programs, and daily safety conversations.